


Over the weekend I made this paint chip mosaic "painting" and am really happy with the way it turned out. I say "I" made it, but I had some help.

I got the inpsiration from Amy's blog - she highlighted a project by Jennifer whose tutorial I followed.
We have a spot in the dining room that I've been thinking about fixing up for quite awhile. I just couldn't figure out what to do with it. The wine rack is from my mom and I bought the flowers and vase when we lived in Mexico. I like them, but it just wasn't working in this little corner.


We had a ton of paint chips from previous room painting projects that I figured I'd throw away. Instead I decided to put them to good use. I picked up a few more from Lowe's (I hope they're not going to track me down) and started on my project.
I used a piece of 24x24 oak from Lowe's. It was $7. If we had had a nice sized piece of scrap wood laying around I would have made that work, but we didn't.
I laid out the paint chips next to the vase to see how the spacing and colors might work. Once I had that together, Thomas made nice stacks for me so we could get started on the wood.

The boys painted the 1/2 inch edge of the wood using black acrylic paint. Then it was time to start the mosaic.
Jennifer mentions spraying adhesive in a row and then laying your paint chips down, then spraying adhesive for the next row. I found that the next spray of adhesive got on the first row of paint chips. So, I just sprayed the whole piece of wood and started laying chips. It worked just fine.

I was concerned about lining up my paint chips so that the mosaic didn't look sloppy. I found that it wasn't that difficult since the wood had nice straight edges.

I'd recommend having a few extra paint chips on hand in case you get paint on one like I did. Also notice where we circled the Limestone name on that one because it was one of our top choices years ago when we were actually using these chips!
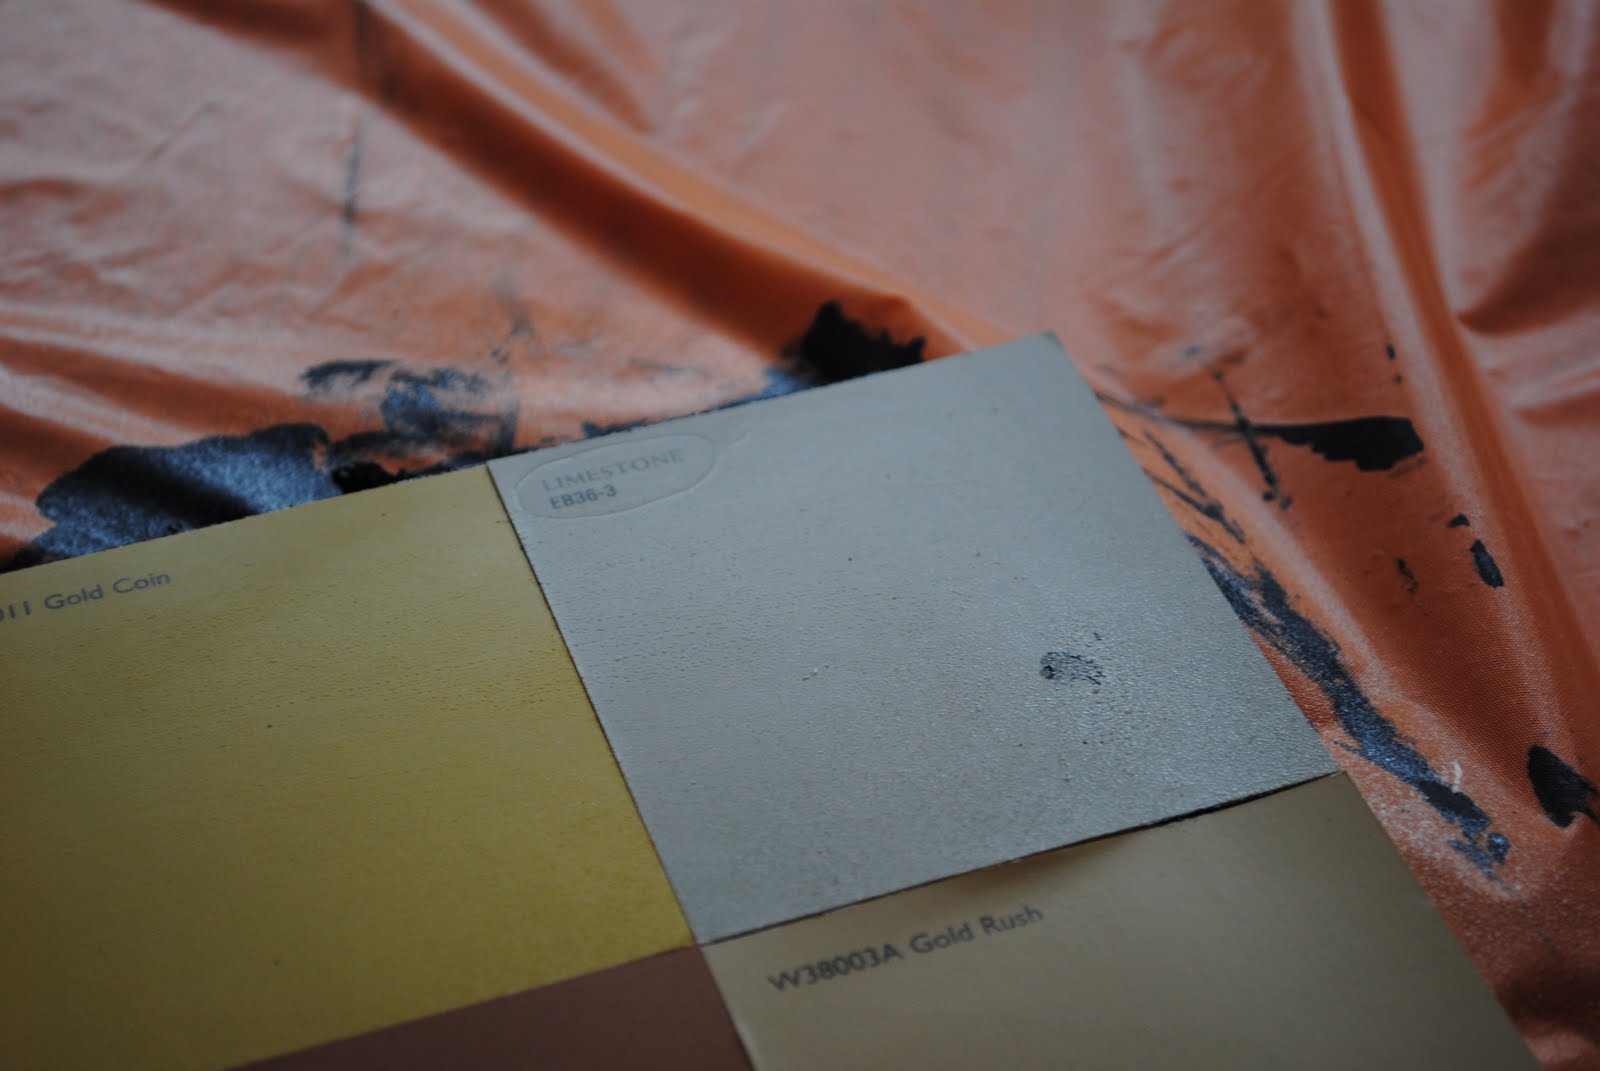
I substituted a different one and we were in business.

Thomas snapped this one of me mid-project. (Pre shower, pre make up. Hey, it was Saturday.)

Following the tutorial, I put down Mod Podge - Matte and let it dry - 3 different layers. It took very little time to dry between steps.

We were left with a great texture and sealed piece of art.

Then we got to staining. Thomas and I picked up a small can of Ebony wood stain at Lowe's. We were going for the aged look and were surpised how quickly this step went.

We put it on and wiped it down with an old rag. Took about 2 minutes.

And we were done!


David put a hanger on the back this morning and hung it for me. I'm really happy with the way it turned out!

What do you think?

No, we didn't paint the wall - that's just the way the sun was hitting the wall at different times of day and it might have something to do with the photographer. But I think this space works a lot better now. What do you think?

Items Used:
24x24 inch board
Black acrylic paint
75 (or so) paint chips
Adhesive spray
Mod Podge - Matte
Ebony stain
Picture hanger
Total Cost: $10
I'm Linking Up!


14 comments:
That looks really cool! Perfect for that space, I think! :-)
Bonnie!!! You did it and it's beautiful! I love it and I'm so glad you showed me your artwork :)
Very Cool Idea, I like it!
Cool project! You look good too.
Now that is very creative, I love it!
AWESOME! :) I might try this one too :)
u may view mine too here
Wow! That is beautiful!
Wow neat! This is a really great site! I am wondering if anyone else has come across something
exactly the same in the past? Keep up the great work!
Your mosaic painting is fabulous! So original, colorful and fun!
That looks great! I think I may make one with browns and blues!
I LOVE IT! What a great idea. TFS
Hello! New here. Love how it turned out, especially after aging it a bit! Very fun!
It turned out great and I think the stain really made a huge difference! Great project.
pathb4me.blogspot.com
This is wonderful! And I have the perfect spot in my kitchen for it. I've been racking my brain, trying to find something for that place, and voila! Your idea will be perfect! I'm new to blogging, I would appreciate if you would check out my blog.
Post a Comment